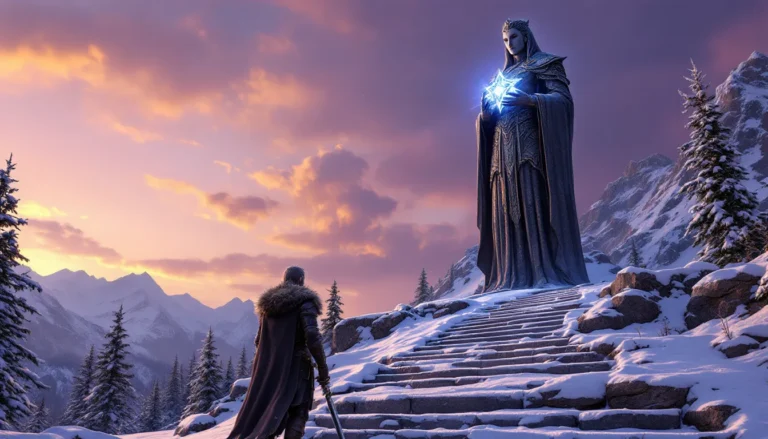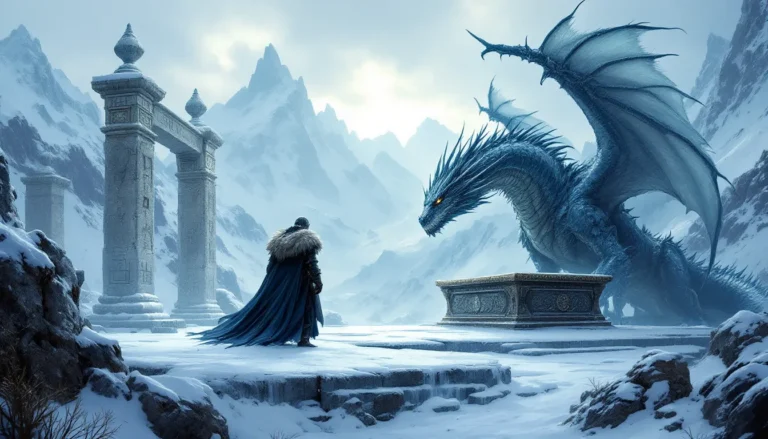
Fifteen years after its release, Skyrim still dominates screenshot galleries across Reddit, Discord, and Steam. The game’s Nordic landscapes, dramatic dragon encounters, and jaw-dropping aurora displays create moments players can’t resist preserving. But there’s a massive gap between hitting F12 and capturing something worth sharing.
The difference between a bland quick-save and a screenshot that earns hundreds of upvotes comes down to technique, tools, and timing. Veterans know that the right ENB preset, a well-placed console command, and perfect golden-hour lighting can transform a routine dungeon crawl into gallery-worthy art. Whether players are documenting a legendary armor set, showcasing a heavily modded build, or simply freezing a breathtaking vista from the Throat of the World, mastering screenshot capture elevates the entire Skyrim experience.
This guide covers everything from basic hotkey controls across PC and console to advanced photography techniques used by the community’s top virtual photographers. Players will learn which mods unlock creative camera angles, how to remove UI clutter for clean compositions, and where to find Skyrim’s most photogenic locations, including hidden spots most players walk past without a second glance.
Table of Contents
ToggleKey Takeaways
- Skyrim screenshots require mastering lighting, composition, and technical tools like ENB presets and free camera mods to transform casual captures into gallery-worthy images.
- Golden hour timing (6-8 AM and PM in-game) combined with weather console commands creates dramatic lighting conditions that elevate screenshot quality dramatically.
- Essential tools for serious Skyrim photography include TFC for free camera control, ENB presets for post-processing effects, and texture mods like Noble Skyrim and Majestic Mountains for sharp, detailed visuals.
- Iconic locations like the Throat of the World and Bleak Falls Barrow offer established shooting opportunities, but hidden gems like Ancestor Glade and Lost Echo Cave produce more unique screenshots.
- Removing the HUD using the tm console command on PC (or iHUD mod) is critical for clean compositions, though console players face limitations requiring strategic timing during naturally cinematic moments.
- Post-processing through Lightroom and careful color grading, combined with sharing on platforms like r/SkyrimPorn and Flickr, helps virtual photographers showcase their work and gain community recognition.
Why Skyrim Screenshots Matter for Gamers
Screenshots serve multiple purposes beyond simple nostalgia. They’re how players document character progression, showcase creative builds, and share memorable glitches that make the community laugh years later. A well-timed screenshot of a giant launching into space or a perfectly framed dragon attack becomes part of gaming folklore.
The Skyrim community thrives on visual storytelling. Modders rely on screenshots to demonstrate their work’s visual impact. Build creators use them to show off armor combinations and spell effects. Speedrunners capture world records. Role-players document their character’s journey from Helgen survivor to Dragonborn legend.
Screenshots also serve as troubleshooting tools. When a mod conflict creates purple textures or a quest breaks, a clear image helps community forums diagnose problems faster than any text description. They’re currency in Discord servers, Reddit threads, and Steam community hubs where players compete for the most impressive capture.
Beyond practical uses, screenshot culture has evolved into its own art form. Virtual photographers spend hours staging scenes, adjusting weather conditions, and tweaking lighting to create images that rival professional concept art. Some players have built entire portfolios showcasing Skyrim’s beauty, proving that even a 2011 game can produce stunning visuals when approached with skill and the right tools.
Getting Started: Basic Screenshot Controls in Skyrim
PC Screenshot Commands and Hotkeys
PC players have multiple native options for capturing screenshots. Steam’s F12 hotkey is the most common default, automatically saving images to Steam’s screenshot folder. The quality matches the game’s current resolution and graphics settings, making it ideal for quick captures during active gameplay.
Print Screen remains a fallback option that copies the current frame to the clipboard. Players can then paste it into image editing software, though this adds an extra step compared to Steam’s automatic save function. Some prefer this method when they want immediate editing access without digging through folders.
For those seeking more control, third-party software like NVIDIA GeForce Experience (Alt + F1) or AMD ReLive (Ctrl + Shift + E) offers additional features. These tools often include instant replay functions, letting players capture moments that already happened, perfect for those “did that just happen?” dragon kills.
The game’s console commands unlock additional screenshot capabilities. Pressing the tilde key (~) opens the console, where “tm” (toggle menus) removes all UI elements for clean captures. This command is essential for serious screenshot work, though players need to remember to re-enter it to restore the HUD.
Console Screenshot Controls (PlayStation and Xbox)
PlayStation users capture screenshots via the Share button on PS4 or the Create button on PS5. A quick press saves a screenshot, while holding the button opens additional sharing options. The PS5’s enhanced hardware captures at full 4K resolution when playing the Anniversary Edition, delivering noticeably sharper results than the PS4’s 1080p limitation.
Xbox players press the Xbox button followed by Y to capture screenshots. The process is slightly more involved than PlayStation’s dedicated button, but Xbox Series X
|
S users benefit from the console’s quick resume feature, making it easy to pause mid-scene for perfect timing. Screenshots save to the console’s capture gallery and can be transferred via the Xbox app.
Both console platforms face the same limitation: HUD removal requires mods on Xbox (which supports them as of the Special Edition) but remains impossible on PlayStation unless using specific gameplay moments when UI naturally disappears. This makes console screenshot work more challenging than PC, where a single console command strips away all interface elements.
Console players should adjust their screenshot format settings in system preferences. Both PlayStation and Xbox default to compressed JPG files, but changing to PNG preserves more detail for later editing, though it consumes more storage space.
Essential Tools and Mods for Better Screenshots
Free Camera and Pose Mods
TFC (Toggle Free Camera) is the first tool every PC screenshot enthusiast learns. Entering “tfc” in the console detaches the camera from the player character, allowing full 360-degree movement through the environment. Adding “tfc 1” freezes the scene entirely, including NPC animations and particle effects, critical for capturing chaotic battle scenes.
FNIS Poser and Nemesis unlock character posing capabilities. These animation frameworks let players position their character in specific stances, from heroic sword-raises to casual tavern lounging. Combined with free camera, they enable staged photography that looks like official promotional material.
For more advanced control, Photo Mode Mod consolidates multiple screenshot functions into a single interface. It includes depth of field sliders, fog controls, and quick-access pose libraries. The mod gained popularity in 2024 and has become standard in most screenshot-focused load orders by 2026.
Immersive HUD (iHUD) provides smarter UI management than the basic tm command. It gradually fades the HUD during exploration and completely hides it when standing still, perfect for players who want clean screenshots without constantly toggling console commands during active gameplay.
Graphics Enhancement Mods and ENB Presets
ENB (Enhanced Natural Beauty) remains the foundation of serious Skyrim screenshot work. These post-processing injectors add realistic lighting, ambient occlusion, depth of field, and color grading that vanilla Skyrim can’t match. Popular 2026 presets like Silent Horizons ENB and Rudy ENB SE each offer distinct visual styles, from photorealistic to fantasy-enhanced.
Choosing an ENB preset depends on the desired aesthetic. NAT 3 (Natural and Atmospheric Tamriel) prioritizes weather variety and atmospheric effects, creating dramatic screenshot opportunities during storms and foggy mornings. Re-Engaged ENB focuses on vibrant colors and fantasy tones, making spell effects and northern lights pop.
Texture overhauls dramatically improve screenshot quality. Noble Skyrim and Skyland AIO replace muddy vanilla textures with sharp 2K or 4K alternatives. For landscapes specifically, Majestic Mountains and Blended Roads ensure that sweeping vistas don’t reveal low-resolution terrain up close.
Lighting mods work alongside ENBs to enhance interior and dungeon screenshots. Lux has become the community standard in 2026, replacing older options like ELFX with more realistic light sources and shadow behavior. Combined with an ENB, it turns torchlit corridors and candlelit taverns into moody screenshot goldmines.
Many players exploring modding utilities discover that screenshot-focused setups require careful performance balancing, as high-resolution textures and ENB effects can tank frame rates.
Screenshot Manager Tools
Steam’s built-in screenshot manager handles basic organization, but serious collectors quickly outgrow it. The interface lacks tagging, sorting by location, or bulk editing capabilities that dedicated tools provide.
ShareX offers vastly superior functionality for PC users. This free screenshot utility includes automatic file naming based on customizable patterns, instant uploads to multiple platforms, and built-in annotation tools. Players can set up hotkeys that capture, edit, and upload in a single keypress.
ScreenshotOrganizer specializes in managing large gaming screenshot collections. It reads metadata to automatically sort images by game, date, and even in-game location when that data exists. For players who’ve accumulated thousands of Skyrim screenshots across multiple playthroughs, this tool prevents the dreaded “Screenshots (473)” folder chaos.
For sharing workflows, Lightroom and Adobe Bridge provide professional-grade organization with rating systems, color labels, and collections. While overkill for casual players, virtual photography enthusiasts appreciate the ability to curate their best work just like real photographers manage portfolios.
Advanced Techniques for Stunning Skyrim Photography
Mastering Lighting and Time of Day
Golden hour timing transforms ordinary screenshots into extraordinary ones. In Skyrim, this occurs roughly between 6-8 AM and 6-8 PM in-game time. The low sun angle creates long shadows, warm color temperatures, and dramatic rim lighting on characters and architecture. Using the console command “set timescale to 0” freezes time at the perfect moment.
Many techniques borrowed from gameplay optimization strategies apply equally to screenshot composition, including understanding how different times of day affect visibility and atmosphere.
Weather manipulation via console commands lets photographers control atmospheric conditions. “fw 10e1ec” forces clear weather, while “fw 10a1a5” summons fog for moody forest shots. Each weather ID creates specific lighting conditions, experimenting with different codes reveals dramatic variations in color grading and shadow intensity.
Torch and spell lighting adds cinematic flair to dark scenes. Holding a torch while exploring ruins creates moving shadows and warm light pools. Fire spells provide orange glows, while frost magic adds cool blue tones. Stacking multiple light sources, a torch in one hand, a flame spell in the other, creates complex lighting rarely seen in standard gameplay.
According to virtual photography communities on RPG Site, understanding environmental lighting separates amateur screenshots from professional-grade captures.
Aurora timing is less predictable but worth waiting for. The northern lights appear more frequently in northern regions like Winterhold and Dawnstar. Players can force auroras using weather console commands, but naturally occurring ones often coincide with other atmospheric effects that create more organic compositions.
Composition and Framing Tips
The rule of thirds applies to Skyrim screenshots just as it does to real photography. Positioning the horizon line at the upper or lower third of the frame, rather than dead center, creates more dynamic compositions. Most ENB presets include optional grid overlays to help visualize these divisions.
Leading lines guide viewer attention through the image. Roads, rivers, mountain ridges, and architectural elements all serve this purpose. A winding path disappearing into distant mountains creates depth and draws the eye naturally through the frame.
Foreground framing adds dimension to landscape shots. Positioning the camera behind tree branches, archways, or rocky outcroppings creates natural frames within the frame. This technique works especially well in Riften’s forest approaches or Solitude’s stone gates.
Depth of field (DOF) separates subjects from backgrounds. ENB presets include adjustable DOF that blurs distant elements while keeping the focal point sharp. For character portraits, shallow DOF isolates the subject. For sweeping landscapes, deeper focus keeps everything from foreground flowers to distant peaks crisp.
Negative space prevents cluttered compositions. Allowing portions of the frame to remain relatively empty, a blank sky, an open snowfield, gives the eye room to rest and emphasizes the main subject. This works particularly well for lone traveler shots against vast Skyrim wilderness.
Weather Effects and Environmental Storytelling
Weather isn’t just background, it’s narrative. Snowstorms tell stories of harsh survival in Winterhold’s blizzards. Rainstorms over Riften create noir atmospheres. Fog in the Morthal swamps adds horror elements. Matching weather to location enhances the environmental storytelling that makes screenshots memorable.
Particle effects from weather systems add motion to still images. Falling snow, rain drops, and blowing leaves suggest movement and atmosphere. Screenshots captured during these effects feel more alive than static clear-weather shots, even though they’re both frozen moments.
Lightning timing requires patience but delivers spectacular results. During thunderstorms, lightning strikes occur at semi-random intervals. Using the tfc command to freeze the scene, then waiting with a screenshot key ready, lets photographers catch the exact frame when lightning illuminates the landscape.
Those developing creative playthrough concepts often discover that weather-appropriate screenshots enhance the storytelling aspect of their documented adventures.
Post-battle smoke and spell effects create dynamic action shots. The moments immediately after combat, when fires still burn, bodies haven’t despawned, and magic effects linger, offer brief windows for dramatic captures that convey recent conflict.
Best Locations in Skyrim for Breathtaking Screenshots
Iconic Landmarks and Vistas
The Throat of the World remains Skyrim’s most photographed location for good reason. The summit offers 360-degree views of the entire map, with cloud layers below and stars above. Sunrise shots from Paarthurnax’s meditation spot have become iconic community images, though patience is required to reach the peak.
Bleak Falls Barrow provides multiple screenshot opportunities. The exterior approach, with the ancient Nordic structure framed against mountain peaks, works for dramatic establishing shots. Inside, the chamber where players obtain the Dragonstone features atmospheric lighting through carved openings, perfect for dungeon photography.
Solitude’s city approach along the stone bridge creates stunning architectural shots. The massive archway, imperial banners, and vertical city layout photograph well from multiple angles. Dawn and dusk lighting makes the gray stone glow warm or cool depending on time of day.
Eldergleam Sanctuary offers the game’s most striking interior location. The massive tree, shafts of light from above, and lush vegetation create an otherworldly atmosphere. The natural color contrast, green foliage against brown cavern walls, makes screenshots pop even without heavy ENB work.
Players documenting their adventures often reference memorable location experiences when planning screenshot tours across Skyrim’s most photogenic areas.
Blackreach remains unmatched for alien underground photography. The glowing fungi, ancient Dwemer architecture, and massive cavern scale create science-fiction aesthetics unusual for fantasy settings. The Giant Glowing Mushroom near Silent City provides an iconic foreground element for wide-angle shots.
Hidden Gems and Secret Spots
Ancestor Glade sees far less traffic than major landmarks but delivers ethereal screenshots. The swarms of glowing moths, ancient trees, and soft diffused lighting create fairy-tale compositions. Few locations match its concentrated beauty in such a small area.
Pilgrim’s Trench near Winterhold offers dramatic ocean photography. The underwater shrine, when captured with proper lighting mods and clear water textures, creates mysterious underwater scenes. Timing shots when aurora appears overhead adds extra visual interest through the water surface.
The Atronach Stone’s island at night provides unique water-reflection opportunities. The standing stone’s glow reflects off calm water, while Masser and Secunda hanging overhead double in the reflection. Long exposure effects from some ENB presets enhance the mirror-like quality.
Kagrenzel combines height, Dwemer architecture, and danger into one screenshot location. The massive drop into the flooded ruins below creates vertigo-inducing shots. The moment players step on the platform and it begins descending, frozen with tfc, captures mechanical movement rarely photographed.
Autumnwatch Tower in the Rift offers understated natural beauty. The fallen tower overgrown with autumn foliage, nearby stream, and orange-red tree canopy creates warm color palettes. It’s rarely mentioned in location guides but delivers consistent results for landscape photographers.
Analysis from gaming communities on Twinfinite consistently ranks hidden locations as producing more unique screenshots than overused landmarks.
Lost Echo Cave features one of Skyrim’s most beautiful waterfalls in a secluded ravine. The fallen tree spanning the gap, surrounding cliffs, and multiple water levels create natural composition layers. Early morning fog rolling through the canyon adds atmospheric depth.
Optimizing Screenshot Quality and File Settings
Resolution and Format Considerations
Native resolution should always match or exceed the player’s monitor for maximum quality. Screenshots captured at 1080p upscaled to 4K for sharing look noticeably softer than native 4K captures. PC players can use Dynamic Super Resolution (DSR) or Virtual Super Resolution (VSR) to render the game at higher resolutions than their monitor supports, then downscale for display while capturing at the higher resolution.
PNG versus JPG becomes critical for serious work. Steam defaults to JPG, which introduces compression artifacts visible during editing or zooming. Switching Steam’s screenshot format to PNG in settings preserves maximum detail and color accuracy, though files are 3-5 times larger. For sharing on social media that re-compresses images anyway, JPG suffices, but archival copies should always use PNG.
Aspect ratio choices affect composition options. The standard 16:9 matches most displays, but 21:9 ultrawide creates cinematic letterbox effects. Some screenshot photographers crop to 4:5 for Instagram-optimized vertical shots. Console commands can adjust FOV to simulate different aspect ratios without physically changing resolution.
Bit depth impacts color gradation quality, especially in sky gradients where banding becomes obvious. Running Skyrim in HDR mode (supported in Anniversary Edition on capable hardware) and capturing HDR screenshots preserves more color information, though editing requires HDR-compatible software.
Removing the HUD for Clean Screenshots
The tm (Toggle Menus) command remains the quickest HUD removal method on PC. A single console command press strips away compass, health bars, crosshair, and notifications. The downside is complete UI removal, players can’t see menus either, requiring a second tm press to restore functionality.
Immersive HUD (iHUD) provides smarter alternatives. This mod allows granular control over which UI elements hide and when. Players can set the compass to fade after three seconds of stillness while keeping the crosshair visible, or configure hotkeys to toggle specific elements independently.
For those building comprehensive knowledge bases, understanding HUD management connects to broader gameplay guidance resources that cover interface customization.
SkyUI configuration offers limited HUD customization in vanilla builds. While it won’t remove elements entirely, players can reduce opacity and scale, making UI less intrusive in screenshots while maintaining some functionality. This matters more during active combat screenshots where completely hiding the HUD isn’t practical.
Console limitations prevent HUD removal on PlayStation platforms entirely. Xbox users can install HUD-toggle mods, but they consume mod space that might be better spent on graphics enhancements. Console photographers often time screenshots during naturally HUD-free moments, conversation close-ups, kill cams, or specific quest cutscenes.
Reviews on IGN frequently highlight how HUD management separates casual screenshot capturing from deliberate virtual photography workflows.
Sharing Your Skyrim Screenshots
Best Platforms for Showcasing Your Work
r/SkyrimPorn (the SFW screenshot subreddit) remains the primary community hub for sharing high-quality Skyrim photography. Posts that include mod lists and ENB presets in comments perform best, as the community appreciates technical transparency. Peak posting times follow typical Reddit patterns, early morning and evening US time zones see highest engagement.
Flickr attracts serious virtual photographers who treat Skyrim screenshots as legitimate art. The platform’s high-resolution support and organized gallery features suit large portfolios. Skyrim-specific groups like “Elder Scrolls Photography” curate the best submissions, providing exposure beyond personal followers.
Twitter/X serves quick-sharing purposes but compresses images aggressively. The platform’s algorithm favors 4:5 aspect ratio vertical images over traditional 16:9 landscape shots. Including popular hashtags like #VirtualPhotography, #Skyrim, and #ScreenshotSaturday increases visibility beyond existing followers.
Discord servers dedicated to Skyrim modding host screenshot channels where technical discussions flourish. Communities like “Skyrim Modding” and “Wabbajack Support” let photographers share work while getting feedback on ENB settings, texture choices, and composition techniques.
Steam Community integrates directly with the platform where most PC players already exist. Screenshots automatically appear in friends’ activity feeds, and the built-in showcase feature lets players curate favorites on their profile. But, Steam’s social features remain underdeveloped compared to dedicated platforms.
Instagram works for mobile-optimized content but requires careful formatting. The platform’s square or vertical preference clashes with Skyrim’s naturally horizontal landscapes. Carousel posts showcasing multiple angles of a single location perform better than individual wide shots that lose detail when cropped.
Post-Processing and Editing Tips
Lightroom has become the standard for batch editing large screenshot collections. Photographers can create presets that adjust exposure, contrast, and color grading, then apply them across multiple images. The non-destructive editing workflow means original files remain untouched while exports reflect all adjustments.
Photoshop handles more advanced edits, removing unwanted NPCs, cloning out UI elements that weren’t fully hidden, or compositing multiple exposures for extended dynamic range. The healing brush tool excels at cleaning up distracting elements like floating quest markers that appeared mid-screenshot.
Color grading separates good screenshots from great ones. Subtle adjustments to shadows, midtones, and highlights create mood without looking over-processed. Cool blue tones suit Winterhold’s frozen wastelands, while warm oranges enhance Riften’s autumn forests. The key is subtlety, viewers shouldn’t immediately notice grading, just feel its effect.
Sharpening recovers detail lost in compression or motion blur. Moderate unsharp masking (around 80-120% at 1-pixel radius in Photoshop) brings back texture in armor, foliage, and architecture. Over-sharpening creates obvious halos and artifacts, so zooming to 100% while adjusting prevents excessive application.
Watermarking remains controversial. Some photographers protect their work with subtle signatures in corners, while others argue watermarks distract from the image. For those concerned about theft, embedded metadata provides invisible attribution that reverse image searches can trace without visible marks.
Export settings matter for different platforms. Instagram requires 1080×1350 pixels for vertical posts. Twitter displays up to 4096×4096 before downscaling. Reddit doesn’t impose strict limits but loads faster at reasonable file sizes around 2-3MB. Always export at maximum quality settings for archival versions, then create platform-specific copies.
Troubleshooting Common Screenshot Issues
Black screenshots plague some PC configurations, usually caused by conflicts between overlays. Running Steam overlay, Discord overlay, NVIDIA GeForce Experience, and MSI Afterburner simultaneously creates capture conflicts. Disabling unnecessary overlays usually resolves the issue, Steam overlay alone handles most screenshot needs.
Missing screenshots often result from incorrect save locations. Steam screenshots default to “…Steamuserdata[userid]760remote72850screenshots” rather than the more intuitive game directory. Checking Steam’s screenshot folder location in settings reveals the actual path. Console players should verify cloud storage hasn’t reached capacity limits.
Washed-out colors in screenshots compared to on-screen appearance indicates color space mismatches. ENB presets render in specific color profiles, but screenshot software may capture in different formats. Forcing screenshots to save in sRGB color space (the web standard) maintains color accuracy across platforms and displays.
Performance drops during screenshot capture with heavy ENB setups suggest VRAM limitations. Depth of field, ambient occlusion, and high-resolution texture mods consume memory. The moment of capture sometimes triggers stutters as the system writes large PNG files. Using JPG format or reducing screenshot resolution helps, though it sacrifices quality.
UI elements refusing to hide after using tm command indicates script conflicts. Mods that modify the HUD sometimes override toggle commands. Loading a clean save without those specific mods active, or using iHUD’s alternative hiding methods, provides workarounds. In worst cases, uninstalling conflicting UI mods resolves persistent problems.
ENB effects not appearing in saved screenshots happens when capture software bypasses the post-processing pipeline. Using Steam’s built-in screenshot function instead of Print Screen usually fixes this, Steam captures the final rendered frame after all effects apply. Third-party tools need “capture from application” mode enabled rather than desktop capture.
Lighting flicker artifacts in screenshots result from TAA (temporal anti-aliasing) interacting with ENB. Single-frame captures don’t benefit from temporal smoothing, sometimes showing noise or shimmer that’s invisible during motion. Switching to SMAA or disabling TAA specifically for screenshot sessions eliminates these artifacts, though gameplay visuals may suffer slightly.
Console command limitations on console platforms (obviously) prevent access to tfc, tm, and weather manipulation. Xbox mod solutions partially address this, but PlayStation remains locked down. Console photographers work within these constraints by timing screenshots during naturally cinematic moments, dragon kill cams, execution animations, or specific quest scenes.
Cloud storage conflicts occasionally corrupt screenshot files when auto-sync happens mid-capture. Temporarily disabling Steam Cloud or console cloud saves during intensive screenshot sessions prevents partial uploads that create broken files. Re-enabling after the session uploads complete files without risk.
Conclusion
Skyrim screenshot mastery separates casual players from dedicated virtual photographers. The gap between hitting a hotkey and creating something worth showcasing comes down to understanding lighting, composition, and the technical tools that unlock creative control. From basic console commands to advanced ENB tweaking, each technique layer adds new possibilities.
The techniques covered here, free camera positioning, weather manipulation, strategic location selection, and proper post-processing, transform screenshot capture from a documentation afterthought into deliberate artistic expression. Combined with the right mods and an understanding of photographic principles, even Skyrim’s aging engine produces images that rival modern releases.
Whether preserving a character’s journey through Tamriel, showcasing a meticulously modded setup, or simply capturing a moment of accidental beauty during a random encounter, these skills ensure those moments receive the visual treatment they deserve. The community continues pushing Skyrim’s screenshot potential fifteen years later, proving that the right tools and knowledge keep even classic games visually relevant.