Liar’s Retreat sits tucked into the mountains of western Skyrim, and most players stumble across it while hunting for ingredients or exploring off the beaten path. What starts as a bandit camp quickly reveals something darker, a blood-soaked tale of betrayal, Falmer ambushes, and bodies scattered through winding caves.
This location isn’t tied to any major questline, so it’s easy to miss entirely. But if you’re hunting for skill books, unique loot, or just a solid dungeon crawl with layered storytelling, Liar’s Retreat delivers. The enemies scale with your level, but the encounter design rewards careful exploration and positioning over pure DPS.
This guide covers everything: exact map coordinates, enemy breakdowns, step-by-step navigation through the cave system, notable loot including skill books, and combat strategies for different builds. Whether you’re a stealth archer picking off bandits from the ridgeline or a two-handed warrior charging through the front gate, you’ll find actionable tactics here.
Table of Contents
ToggleKey Takeaways
- Liar’s Retreat is located in western Skyrim between Karthwasten and Dragon Bridge, featuring a bandit camp exterior that leads into a cave system filled with Falmer and environmental storytelling through scattered corpses and journals.
- The Longhammer, a unique warhammer with 30% faster swing speed than standard versions, is the primary reward and sits next to Rahd’s body in the final chamber, making it ideal for two-handed warrior builds.
- Recommended level range is 15–20 for a balanced challenge; below level 10 the Falmer sections become brutal due to poison damage and group pulls, while above level 25 the encounter feels routine.
- The location rewards tactical play with crowd control, stealth approaches against bandits, and environmental positioning in the final Falmer chamber—bone chimes alert enemies if triggered carelessly.
- Liar’s Retreat offers solid alchemy spawns including Chaurus Eggs, Falmer Ears, and poison-ingredient plants, plus a skill book (The Argonian Account, Book IV) that increases Lockpicking, making it worthwhile for resource farming.
- The Liar’s Retreat Skyrim location has no direct quest ties but can appear as a radiant objective, and its self-contained narrative about bandits being ambushed by Falmer adds depth without relying on main questlines.
Where to Find Liar’s Retreat on the Skyrim Map
Liar’s Retreat is located in the far western reach of Skyrim, nestled in the mountains between Karthwasten and Left Hand Mine. The exact coordinates place it northwest of Broken Tower Redoubt and directly west of Dragon Bridge.
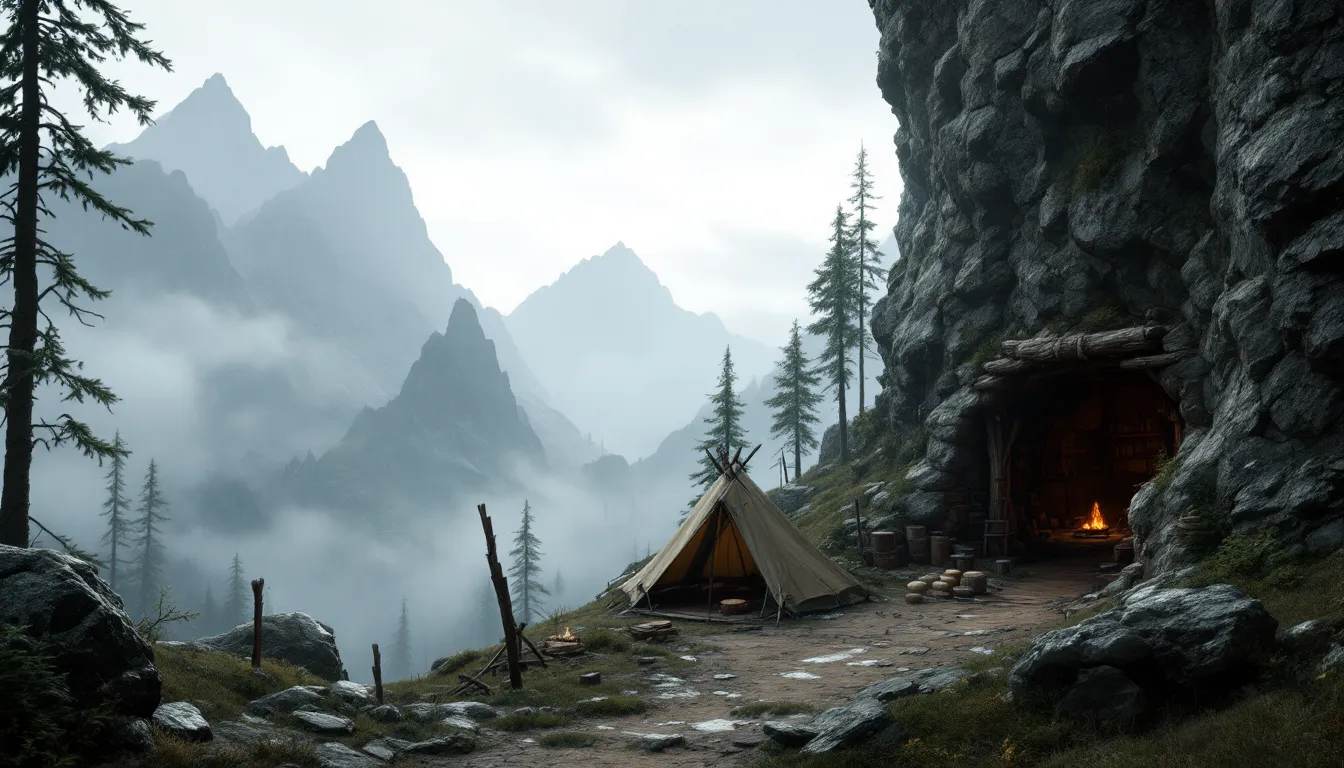
The entrance consists of a small bandit camp perched on a cliff overlooking a stream. You’ll spot several tents, a campfire, and wooden fortifications from the approach. The cave entrance itself sits behind the camp, marked by a dark opening flanked by wooden posts.
If you’re traveling by road, take the path west from Dragon Bridge toward the Reach border. Watch for a fork where the main road curves south, Liar’s Retreat is up the mountain trail to the northwest. Fast travel to Karthwasten or Left Hand Mine puts you closest, but expect a 2-3 minute hike through moderately hilly terrain.
Navigating from Major Cities and Landmarks
From Solitude, head southeast through Dragon Bridge, then follow the western road into the mountains. The trip takes about 5-6 minutes on foot if you stick to the roads, longer if you cut cross-country and hit cliffsides.
From Markarth, travel northeast past Karthwasten. Liar’s Retreat sits on the opposite side of the mountain ridge from the Reach’s interior settlements, so you’ll be climbing elevation for most of the approach.
From Rorikstead, head west and slightly north. This route crosses open plains before hitting the foothills. Watch for wildlife spawns, sabre cats and bears patrol this area frequently.
Fast travel markers near Liar’s Retreat:
- Karthwasten (closest)
- Left Hand Mine
- Dragon Bridge
- Broken Tower Redoubt (if cleared previously)
The location doesn’t appear on your map until discovered, and there’s no map marker from quests. You’ll need to explore the western mountains manually or follow the river valleys that cut through the region.
What You’ll Encounter at Liar’s Retreat
Liar’s Retreat blends two enemy factions in a grim narrative setup. The exterior and initial cave sections host bandits, but as you push deeper, you’ll discover they’ve been slaughtered by Falmer emerging from the lower tunnels. Bodies litter the cave floors, and environmental storytelling through notes and corpse placement reveals the chaos.
Enemy Types and Difficulty Level
Bandits occupy the entrance camp and outer cave. Expect standard bandit variants based on your level:
- Bandit Outlaw or Bandit Thug (levels 1-9)
- Bandit Highwayman or Bandit Plunderer (levels 9-19)
- Bandit Marauder or Bandit Warrior (levels 19-28)
- Bandit Chief variants leading the camp (levels 28+)
The bandits use mixed tactics, archers on elevated positions, melee fighters guarding chokepoints, and occasional mages depending on your level. They’re equipped with leveled gear, so early-game players face iron and hide armor while higher-level characters encounter steel plate and elven equipment.
Falmer dominate the deeper sections, accompanied by Chaurus. The Falmer here include:
- Falmer (basic melee)
- Falmer Skulker (dual-wielding, aggressive)
- Falmer Shadowmaster (stealth-focused, harder to detect)
- Falmer Warmonger (heavy armor, two-handed weapons)
Chaurus spawn in groups of 2-3, with Chaurus Reapers appearing if you’re level 30+. Falmer hit hard with poison damage and swarm tactics. Their hearing-based detection means sneaking is viable even without high Sneak skill, but any combat noise draws reinforcements from connected chambers.
Difficulty scaling: Liar’s Retreat is balanced for players level 10-25. Below level 10, the Falmer sections become brutal due to poison damage and multi-enemy pulls. Above level 25, the encounter feels routine unless you’re running difficulty mods or Legendary difficulty.
The Story Behind Liar’s Retreat
The environmental narrative unfolds through Longhammer’s Journal and scattered corpses. A bandit group led by Rahd took over the cave as a hideout, unaware that Falmer nested in the lower caverns. When they pushed deeper to expand their territory, the Falmer counterattacked.
You’ll find Rahd’s body in the final chamber, surrounded by dead bandits and Falmer. The journal entries describe growing paranoia, strange noises from below, and the final doomed stand. It’s a self-contained story with no quest tie-in, but it adds weight to the location beyond “generic bandit cave #47.”
The design mirrors several Skyrim dungeon storytelling techniques that Bethesda uses to create environmental micro-narratives. Dead bandits positioned mid-flight, overturned furniture, and blood trails guide you through the chaos without explicit exposition.
Step-by-Step Walkthrough of Liar’s Retreat
Liar’s Retreat follows a mostly linear path with a few side rooms for loot. The progression moves from exterior camp through bandit-controlled caves into Falmer territory, ending in a large chamber with the final boss-tier Falmer.
Clearing the Exterior Bandit Camp
The camp holds 3-4 bandits depending on your level. One archer typically patrols the upper tent area, one or two melee fighters guard the fire, and a fourth may be inside the largest tent.
Stealth approach: Circle around the left (north) side of the camp. Rocks and bushes provide cover up to the upper tent. Take out the archer first to eliminate ranged pressure, then pick off isolated targets.
Frontal assault: Charge straight up the main path. The bandits will converge on the campfire area, creating a chokepoint. Use AoE spells or power attacks to control the cluster. Watch for the archer repositioning to higher ground.
Loot the tents before entering the cave. The chief’s tent (largest, rear of camp) contains a locked chest (Adept) with leveled gold and a chance for enchanted jewelry. Check barrels and sacks for alchemy ingredients, Nordic Barnacle and Nightshade spawn here frequently.
Navigating the Interior Cave System
Enter the cave and immediately drop down a short ledge. The first chamber has a narrow stream running through it and two bandits. The passage splits briefly but reconverges, both routes lead to the same middle section.
Follow the water downstream. You’ll pass through a chamber with a wooden bridge crossing the stream. A bandit or two guard this area. Check the left alcove for a leveled potion on a shelf.
The cave narrows into a tunnel. Here’s where the narrative shift happens, you’ll start finding dead bandits with Falmer arrows, claw marks, and Chaurus bite wounds. One bandit corpse near an overturned barrel holds Longhammer’s Journal, which details the group’s doomed encounter.
Push through the tunnel into the first Falmer chamber. This room has a raised platform on the left and a lower water channel. Two Falmer and one Chaurus spawn here. The Falmer will rush you immediately if detected: the Chaurus patrols the water.
Key environmental hazard: Hanging bone chimes trigger if you move too fast. They alert all Falmer in the area. Shoot them down with arrows or carefully walk around them if sneaking.
Continue forward and down another short drop. The path splits around a central rock pillar. Both routes loop to the same destination, but the right path has a Falmer tent with alchemy ingredients (see loot section below).
The Final Confrontation with the Falmer
The last chamber is a large, multi-tiered cavern with a waterfall and several Falmer huts. Four to five Falmer spawn here, including at least one Falmer Shadowmaster or Warmonger depending on your level. Two Chaurus spawn near the water at the bottom tier.
Rahd’s body lies near the center, surrounded by dead bandits and Falmer corpses. The Longhammer, a unique warhammer, rests next to his body (see loot section for stats).
Boss fight tactics:
- The Falmer swarm from multiple angles. Prioritize ranged Falmer (Shaman variants) if present to reduce magic pressure.
- Use the huts and rock pillars for cover. Circle-strafing keeps Chaurus from landing poison attacks.
- If you’re a mage, use Flames or Frostbite early-game, or Fireball if higher level to control groups.
- Archers should claim the upper ledges. Snipe from elevation and reposition if Falmer close the gap.
After clearing the final chamber, loot Rahd’s body and the surrounding corpses. The exit sits at the back of the cavern, leading to a small tunnel that loops back to an upper ledge near the entrance. This one-way shortcut lets you fast travel out without retracing the entire dungeon.
Notable Loot and Rewards at Liar’s Retreat
Liar’s Retreat offers one unique weapon, a skill book, and solid alchemy/crafting material spawns. The loot density is average for a medium-sized dungeon, but the unique item alone makes the detour worthwhile for certain builds.
Unique Items and Skill Books
The Longhammer is the highlight here. This unique warhammer sits next to Rahd’s body in the final chamber.
Longhammer stats:
- Base damage: 21 (same as standard warhammer)
- Weight: 18
- Value: 26
- Unique property: 30% faster swing speed compared to regular warhammers
The swing speed boost is significant. Standard warhammers have a 0.6-second swing speed: Longhammer swings at approximately 0.42 seconds. This translates to higher DPS and better crowd control in melee. It’s not enchanted, so you can apply your own enchantment without overwriting a unique effect.
Best builds for Longhammer:
- Two-handed weapon specialists
- Berserker builds using elemental fury (though note that elemental fury doesn’t stack with the innate speed boost)
- Characters prioritizing stagger and knockback effects
The faster swing speed also improves stamina efficiency. You land more hits per stamina pool, increasing overall damage output before needing to disengage.
Skill Book: The Argonian Account, Book IV spawns in the bandit camp area or inside the cave (location varies slightly across game versions and mods). This book increases Lockpicking by one skill level. Check the tables and shelves near bedrolls.
Leveled loot: Boss chests appear in two locations:
- Exterior camp, chief’s tent (Adept lock)
- Final chamber, near the waterfall (Apprentice lock)
Both contain leveled gold (50-200), random enchanted jewelry, and a chance for leveled weapons or armor. The final chest has slightly better loot tables due to being deeper in the dungeon.
Alchemy Ingredients and Crafting Materials
Liar’s Retreat has above-average alchemy spawns, especially for poison and paralysis ingredients.
Guaranteed ingredient spawns:
- Falmer Ears (4-6 total from Falmer corpses)
- Chaurus Eggs (3-5 in Falmer huts)
- Glowing Mushroom (scattered along cave walls, 8-12 total)
- Bleeding Crown (near water sources, 3-5)
- White Cap (2-3 near dead trees in the cave)
High-value finds:
- Nightshade (exterior camp, 2-3 plants)
- Imp Stool (cave interior, 4-6)
- Namira’s Rot (damp sections, 2-3)
The Chaurus Eggs are particularly valuable. They’re worth 15 gold each and combine with Imp Stool to create paralysis poisons. Falmer Ears mix with Nightshade for potent damage health potions.
Crafting materials:
- Iron ore (2-3 veins near the waterfall)
- Moonstone ore (1 vein, upper ledge in final chamber)
- Leather and leather strips (from bandit corpses)
Many detailed location guides track ingredient spawns room-by-room, but the Falmer sections here rival any dedicated alchemy farming route for poison ingredients.
Tips and Strategies for Conquering Liar’s Retreat
Liar’s Retreat punishes careless aggro pulls but rewards tactical play. The mix of bandits and Falmer means you’ll need to adapt combat strategies mid-dungeon.
Recommended Character Levels and Builds
Minimum level: 10. Below this, the Falmer sections become a slog due to limited gear and skill perks. Poison damage stacks quickly, and you’ll burn through health potions.
Comfortable range: 15-20. At this level, you’ve invested in core combat perks and have access to mid-tier gear. Falmer are challenging but manageable.
Overleveled: 25+. The encounter remains mechanically interesting, but you’ll steamroll through without much danger unless running high difficulty settings.
Best builds for Liar’s Retreat:
Stealth Archer:
- Pick off bandits from long range in the exterior camp
- Use Detect Life or Aura Whisper to spot Falmer through walls
- Hang back and snipe into the final chamber from upper ledges
- Perks: Steady Hand (Archery), Muffled Movement (Sneak)
Two-Handed Warrior:
- Charge the bandit camp and use sweeping power attacks
- Tank Falmer swarms with heavy armor and health pool
- Grab the Longhammer as a build-defining weapon upgrade
- Perks: Limbsplitter (Two-Handed), Juggernaut (Heavy Armor)
Destruction Mage:
- Use Flames or Frostbite to control bandit melee fighters
- Fireball or Lightning Bolt to clear Falmer clusters
- Ward spells counter Falmer Shaman magic
- Perks: Augmented Flames/Frost (Destruction), Regeneration (Restoration)
One-Handed + Shield:
- Block bandit power attacks and counter
- Use Shield Bash to stagger Falmer and interrupt attacks
- Poison your weapon for bonus damage against Chaurus
- Perks: Quick Reflexes (Block), Dual Flurry if dual-wielding
Avoid builds:
- Pure Illusion mages struggle here. Falmer are immune to most Illusion spells (Calm, Fear, Fury), and bandits require higher Illusion skill to affect reliably.
- Unarmed builds work but face difficulty in the Falmer sections due to needing to facetank poison damage.
Combat Tactics for Different Playstyles
Crowd control is king. Falmer attack in groups of 2-3. Fus Ro Dah (Unrelenting Force shout) staggers entire groups, buying you time to focus-fire one target. Ice Storm or Fireball serve similar roles for mages.
Manage stamina carefully. Power attacks and sprinting drain stamina fast. If you run dry mid-fight, you can’t block or dodge effectively. Keep vegetable soup or stamina potions hotkeyed.
Exploit Falmer hearing mechanics. Falmer detect via sound, not sight. Sneaking works even with lower Sneak skill if you move slowly and avoid running. But, combat noise alerts nearby chambers, so finish fights quickly or reposition before reinforcements arrive.
Poison resist or cure potions: Chaurus poison deals 4 damage per second for 30 seconds. That’s 120 damage from a single bite if untreated. Carry Cure Poison potions or wear Resist Poison enchantments. Nords’ 50% frost resistance doesn’t help here, Chaurus use poison, not frost.
Use the environment. The final chamber has elevation changes. Archers and mages should claim high ground and force Falmer to path upward, creating firing lanes. Melee builds can funnel Falmer through narrow gaps to avoid being surrounded.
Shout cooldowns: If you’re shout-dependent, the final chamber’s multi-wave fight punishes long cooldowns. Amulet of Talos reduces shout cooldown by 20%, which matters if you’re relying on Unrelenting Force or Marked for Death.
Followers: Liar’s Retreat is follower-friendly. The dungeon is wide enough that AI pathing doesn’t break constantly. But, followers will trigger bone chimes if you’re sneaking, so dismiss or order them to wait before Falmer sections if you’re going pure stealth.
Quests and Connections to Liar’s Retreat
Liar’s Retreat has no direct quest ties in the base game or DLCs. It’s a freestanding location without map markers or journal entries pointing you there. This makes it easy to miss entirely, especially if you fast-travel frequently and skip overland exploration.
But, several radiant quests can target Liar’s Retreat as a destination:
Bounty: Bandit Boss, Jarl of Solitude or Markarth may assign a bounty to clear the bandit leader at Liar’s Retreat. The target is whichever bandit chief spawns in the exterior camp. Radiant bounties randomize location, so this isn’t guaranteed.
Dungeon Delving (Companions), Farkas or Vilkas can send you to Liar’s Retreat to retrieve a radiant item (typically a weapon or piece of armor). The target item spawns in one of the chests after accepting the quest.
Kill the Bandit Leader (misc), A generic radiant quest that can point you here. Similar to bounty quests but from different quest-givers.
The Longhammer as quest loot: Some players report that certain weapon-retrieval radiant quests place the Longhammer as the target item, though this is inconsistent across playthroughs. In most cases, the Longhammer simply sits on Rahd’s corpse regardless of quest status.
Because Liar’s Retreat lacks a major quest line, it’s one of those locations best discovered organically. If you’re completionist-hunting or following structured game walkthroughs, Liar’s Retreat sits in the “optional dungeon” category alongside places like Broken Helm Hollow or Lost Knife Hideout.
Mod integrations: Several quest mods incorporate Liar’s Retreat. Legacy of the Dragonborn adds display cases for the Longhammer. Quest expansion mods sometimes use it as a radiant target or tie it into new storylines. Check mod descriptions if you’re running heavy load orders.
Related Locations Worth Exploring Nearby
Liar’s Retreat sits in a dense cluster of western Skyrim locations. If you’re in the area, several other points of interest are within walking distance.
Broken Tower Redoubt, Southeast of Liar’s Retreat. A Forsworn camp built into a ruined tower. Harder than Liar’s Retreat due to Forsworn Briarhearts and elevated archers. Contains the Sunderstone Gorge entrance at the base.
Sunderstone Gorge, Directly connected to Broken Tower Redoubt. A Forsworn-infested cave system with warlocks and hagraven. No unique loot, but solid leveled chests and the Conjure Flaming Familiar spell tome can spawn here.
Left Hand Mine, Northeast of Liar’s Retreat. A working mine populated by miners during the day, bandits at night (depending on in-game events). Iron ore veins inside. Minor location, but useful for fast travel anchoring.
Karthwasten, The nearest settlement. A small mining village caught in a territorial dispute between two NPCs (related to the quest “Karthwasten Hall”). Stop here to sell loot or restock potions before hitting Liar’s Retreat.
Dragon Bridge, East along the road. A larger settlement with an inn (Four Shields Tavern), general store, and lumber mill. Good for selling heavy loot like armor and weapons. The Penitus Oculatus outpost is here if you’re running Dark Brotherhood questlines.
Purewater Run, A small hunter’s camp south of Liar’s Retreat. Not marked on most maps but contains a tanning rack and alchemy table. Useful for crafting on the go.
Reach Stormcloak Camp or Reach Imperial Camp, Depending on Civil War progression, one of these military camps appears in the area. They offer free beds and trainers if you’re aligned with that faction.
The western Reach is dense with Forsworn and bandit locations, so back-to-back dungeon crawling is efficient here. Route from Liar’s Retreat → Broken Tower Redoubt → Sunderstone Gorge if you want a 30-40 minute clearing session.
Conclusion
Liar’s Retreat delivers a tight dungeon experience with environmental storytelling and one standout reward. The Longhammer alone justifies the trip for two-handed builds, and the mix of bandits-to-Falmer progression keeps the encounter design from feeling repetitive.
It’s the kind of location that reminds you why Skyrim’s exploration loop still works a decade-plus after release. No quest marker, no NPC exposition, just a cave in the mountains with a story told through corpses and loot.
If you’re level 15-20, running a melee build, or hunting for alchemy ingredients, add Liar’s Retreat to your route. And if you’ve already cleared it years ago, it’s worth revisiting on a new character to grab the Longhammer early and carry it through the playthrough.