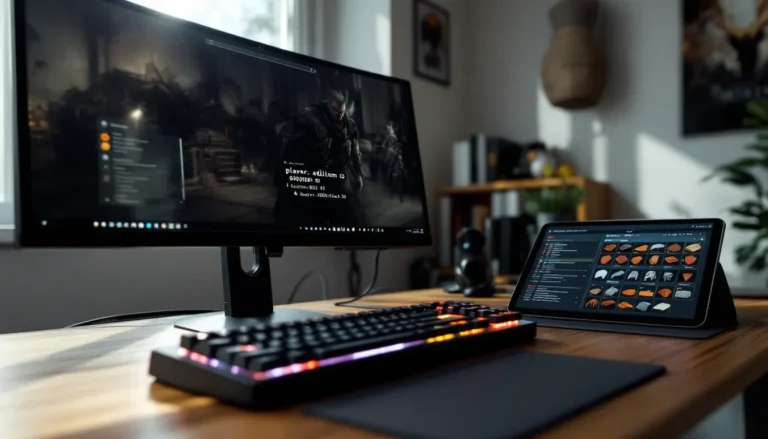
VR gaming tips can transform a frustrating first experience into something genuinely exciting. Virtual reality has moved beyond novelty, it’s now a legitimate gaming platform with incredible depth. But here’s the thing: jumping in without preparation often leads to motion sickness, blurry visuals, or worse, a broken TV from an enthusiastic punch. The difference between “this is amazing” and “I feel terrible” usually comes down to setup and technique. This guide covers practical VR gaming tips that help players get the most from their headsets, from proper space configuration to equipment maintenance.
Table of Contents
ToggleKey Takeaways
- Set up a clear play space of at least 6.5 x 6.5 feet with moderate, even lighting for optimal VR tracking and safety.
- Adjust your headset’s IPD setting and strap tension properly to avoid eye strain and maximize visual clarity.
- Start with stationary VR games and limit initial sessions to 15-20 minutes to build tolerance and prevent motion sickness.
- Prioritize a stable 90fps frame rate over higher graphics settings—smooth performance reduces discomfort and improves immersion.
- Protect your lenses from scratches and sunlight damage by using microfiber cloths and storing headsets face-down or in cases.
- These VR gaming tips apply across all major platforms, helping both beginners and experienced players get the most from their headsets.
Setting Up Your Play Space Safely
A proper play space prevents accidents and improves immersion. Most VR systems require a minimum area of 6.5 feet by 6.5 feet for room-scale experiences. Players should clear this zone of furniture, pets, and anything breakable before starting.
The guardian or boundary system exists for good reason. Players should set it up carefully, even if it feels tedious. That virtual wall becomes invisible once the action starts, but the coffee table definitely isn’t. Setting the boundary a few inches inside the actual walls provides extra buffer room.
Lighting matters more than most people realize. Too bright, and the headset’s cameras struggle with tracking. Too dark, and the same problem occurs. Moderate, even lighting works best. Mirrors and large windows can confuse tracking systems, so covering them or playing at night helps.
Cable management deserves attention for tethered headsets. A ceiling-mounted pulley system costs around $20 and eliminates the constant cord-stepping that breaks immersion. For wireless setups, ensuring the router sits in the same room reduces latency issues.
These VR gaming tips for space setup seem basic, but they prevent most common problems new players encounter.
Adjusting Your Headset for Comfort and Clarity
A poorly adjusted headset ruins everything. The sweet spot for visual clarity is surprisingly small, and finding it requires patience.
IPD (interpupillary distance) adjustment comes first. This setting matches the lens spacing to the distance between the player’s eyes. Most headsets offer either physical adjustment via a slider or software-based tweaking. Getting this wrong causes eye strain and blurry edges. Players can measure their IPD using smartphone apps or a ruler and mirror.
The headset should sit level on the face, not tilted up or down. Many players wear it too high initially. The correct position places the eyes directly in the center of the lenses. A quick test: text should appear equally sharp across the entire field of view.
Strap tension affects both comfort and tracking. Too loose, and the headset shifts during movement. Too tight, and pressure points develop within minutes. The back strap should cup the base of the skull, with weight distributed evenly.
For glasses wearers, prescription lens inserts offer a better solution than squeezing frames into the headset. They cost between $50-100 but eliminate scratching risks and improve comfort dramatically.
These VR gaming tips for headset adjustment apply across most major platforms, from Meta Quest to PlayStation VR2.
Preventing Motion Sickness
Motion sickness affects roughly 40% of VR users to some degree. The brain gets confused when visual movement doesn’t match physical sensation. But it’s manageable with the right approach.
New players should start with stationary experiences. Games like Beat Saber or Job Simulator keep the player in one spot while providing full VR immersion. This builds VR legs, the brain’s gradual adaptation to virtual environments.
Session length matters enormously. First-timers should limit play to 15-20 minutes, even if they feel fine. Symptoms often appear after stopping, not during play. Extending sessions by 5-10 minutes each day allows gradual adjustment.
Graphics settings impact comfort more than most realize. Lower frame rates and stuttering trigger sickness faster than smooth gameplay. Prioritizing 90fps over visual quality makes a significant difference.
Teleportation movement options exist in most games for good reason. Smooth locomotion (using a joystick to walk) challenges even experienced VR users. There’s no shame in using comfort settings.
Ginger, whether as candy, tea, or supplements, actually helps some people. It’s not a placebo: studies support its anti-nausea properties. Having some nearby doesn’t hurt.
A fan blowing on the face provides a fixed reference point and keeps the player cool, both of which reduce sickness. This simple VR gaming tip makes a surprising difference.
Optimizing Graphics and Performance
VR demands more from hardware than flat-screen gaming. A game running smoothly on a monitor might stutter in VR, and that stutter causes problems beyond visual quality.
For PC VR users, resolution scaling offers the biggest bang for the buck. Running at 80% resolution often looks nearly identical to 100% while dramatically improving frame rates. Most VR platforms include this slider in their settings menus.
Supersampling works in the opposite direction, rendering at higher resolution than the display. It sharpens text and distant objects noticeably. Players with powerful GPUs should experiment with 1.2x to 1.5x supersampling.
Refresh rate selection involves tradeoffs. Higher rates (120Hz vs 90Hz) feel smoother but require more GPU power. Locking to a stable 90Hz beats an unstable 120Hz every time.
For standalone headsets like Quest 3, closing background apps before launching games frees up processing power. The difference isn’t huge, but every bit helps on mobile hardware.
Wireless streaming from PC introduces compression artifacts and latency. A dedicated Wi-Fi 6 router in the same room, with the 5GHz band reserved for VR, minimizes these issues.
These VR gaming tips for performance apply whether someone’s running a $300 standalone headset or a $3000 PC setup.
Taking Care of Your VR Equipment
VR headsets aren’t cheap, and proper maintenance extends their lifespan considerably.
Lenses scratch easily and replacements cost a fortune. Players should never use paper towels, shirts, or regular cloths on them. Microfiber cloths designed for camera lenses work best. Dry wiping removes most smudges: lens cleaning solution handles stubborn spots.
Direct sunlight destroys LCD and OLED panels within minutes. The lenses focus light like a magnifying glass, burning the display permanently. Storing headsets face-down or in cases prevents accidental sun exposure. This VR gaming tip alone saves countless headsets each year.
Facial interfaces absorb sweat and eventually smell terrible. Silicone covers ($15-30) solve this problem and wipe clean easily. For shared headsets, disposable hygiene covers make sense.
Controller batteries die at the worst times. Rechargeable batteries with a dedicated charging station ensure controllers stay ready. For built-in batteries, maintaining 20-80% charge extends overall battery lifespan.
Firmware updates sometimes feel annoying, but they often include tracking improvements and bug fixes. Keeping everything current prevents weird issues.
Storing cables properly, loosely coiled, not tightly wound, prevents internal wire damage. Tethered headsets live or die by their cables.